 Looking at the inside of a clock and determining how all the parts work together can be fascinating, but trying to figure out how to correct a clock when it needs an adjustment can be downright intimidating. However, if you learn the basics of clock movement correction assemblies, you can foster the fascination, while eliminating the intimidation.
Start With the Basics
Many clocks are controlled by Hansen movements, which are designed to provide split-second accuracy. Small motors dictate these movements, but sometimes the motors need adjustment.
To better understand the adjustments you may need to make, start by learning about the two major clock assembly manufacturers.
Each manufacturer has a distinct assembly and different methods to make adjustments.
Simplex Corrections
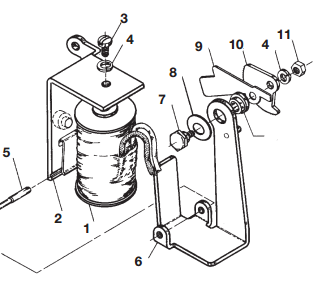
A steel cam and sector assembly (number 10 in the diagram below) is used to make corrections. Corrections can be made in hourly or 12-hour cycles.
The directions to make these types of adjustments are detailed, but if followed accurately, will result in success.

Instructions can be found in our Simplex Correction Manual
Cincinnati and Edwards Corrections
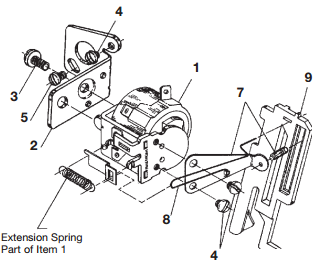
A plastic corrective lever (number 9 in the diagram below) is used to make corrections with clock movement assemblies made by Cincinnati and Edwards.
Again, corrections are made in hourly or 12-hour procedures.

Detailed instructions for adjustments and corrections can be found in our Cincinnati/Edwards Correction Manual
Final Adjustments
Again, assemblies from each manufacturer are different and require specific adjustments in order to function accurately. New parts alone won't get your clock to work correctly unless you follow the instructions in the provided links.
Also, it's important to test your newly adjusted clock overnight to make sure the corrections work.
American Time uses both Cincinnati/Edwards and Simplex assemblies and has experts on staff to assist with any adjustment you may need to make.

